Saturday, December 5, 2009
Instruction Installation Basic 2
- Step 1
Read through the user manual that came with your Dish Network satellite dish, so you can be sure you understand the equipment.
- Step 2
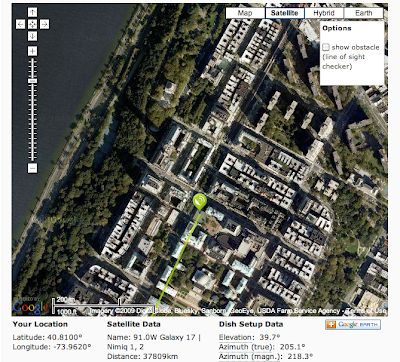
Figure out the longitude and latitude of your location, using a GPS device or the Internet.
- Step 3
Find the satellite nearest your location. (See Resources for a helpful Web site.)
- Step 4
Identify a location where the dish antenna can face south without any obstruction (especially from a wall). Ideally, look for space next to a balcony, patio or window.
- Step 5
Install the Dish Network satellite dish, and make sure it's held in place securely. Take care that it won't get jostled by people bumping into it; it shouldn't move easily.
- Step 6
Use the coaxial cable to connect the dish to the receiver.
- Step 7
Connect the receiver to your TV.
- Step 8
Switch on the TV and follow the steps listed in the user manual to see if the newly installed system is catching a signal.
- Step 9
Align the dish. To do so, determine the elevation level appropriate for your location and identify the elevation indicator on the dish. Adjust the dish elevation by loosening its elevation nuts and gently moving it up and down. When the elevation indicator lines up with the elevation number for your location, the dish is adjusted properly.
- Step 10
Compare the channels appearing on your TV with the channel guide to ensure that the dish is getting a signal from the correct satellite. Otherwise, you may end up with a set of channels you're not interested in.
- Step 11
Focus the picture by moving the LNB—or low-noise blocker—function in and out. Someone else may need to help you test the picture quality by checking the TV for a clear signal while you're rotating or adjusting the dish.
Instruction Installation Basic
- Step 1
Call your satellite company and find out which part of the sky their satellite can be found. In some cases, the location may be listed in your satellite manual.
- Step 2
Choose a location on your roof or somewhere else on your property with an unobstructed view in the direction your satellite company has indicated.
- Step 3
Mount the satellite mast in your chosen location, using 6-inch lag bolts to keep it in place. Use a carpenter's level or similar device to ensure it is parallel to the ground.
- Step 4
Attach the antenna to the dish array, sliding into place without bolting it into position. (You'll need to align it later on in the process.)
- Step 5
Connect a grounding block to the ground near the spot where you intend to run the coaxial cable from the satellite dish to your TV.
- Step 6
Run RG6 coaxial cable through the antenna array, down the side of your house to the grounding block and then into your receiver in your living room. If you need to drill a hole in the wall, use a 3/8-inch bit and choose a spot near your receiver where there are no wires or support beams in the wall.
- Step 7
Connect the wire from the grounding block to the cable antenna and another piece of cold metal (such as a cold water pipe) on the outside of your house. This protects your system and home in the event of a lightning strike
- Step 8
Attach the LNB (low noise blocker) to the end of your antenna and connect the end of the coaxial cable to it.
- Step 9
Connect a satellite signal meter to the antenna and adjust its direction until it receives the strongest possible signal from the satellite. Most satellite dishes allow you to do this by hand, shifting the azimuth and elevation direction until it locks on to the signal.
- Step 10
Check the receiver downstairs to make sure the signal is strong.
- Step 11
Bolt the antenna into position and used staples to secure the coaxial cable to the side of your house.
- Step 12
Turn on the receiver and follow any remaining instructions to complete your satellite set-up.
Saturday, November 14, 2009
Video Clip for installation guide
Friday, November 13, 2009
Satellite Installation Guide

